Sunday, November 28, 2010

Butternut Squash Soup

IMAG1099

This year, we had Thanksgiving for my side of the family at my house – I’ll write a separate post about that (probably). 

I decided that in addition to the usual turkey, stuffing, potatoes, etc., I wanted to make this soup.  I had some very good butternut squash soup at Wabash College a few weeks ago, and this was inspired by that.  I don’t think mine turned out as good, but I definitely still enjoyed it, and would recommend that anyone try it out – it’s really easy, and so tasty.  Perfect Fall dish.

Also, my mom surprised me with a stick blender, so I was itching to use it on something!

YOU WILL NEED:

  • 1 butternut squash (2-3 lbs)
  • 2 tbsp butter
  • 1 onion (medium-large)
  • 6 cups vegetable stock
  • cinnamon, nutmeg, salt, pepper

YOU WILL NEED TO":

  1. Dice the onion.
  2. In a large pot, melt the butter and cook the onion until it turns all soft and translucent.IMAG1092
  3. While that’s going on, peel and de-seed the squash.  (Peel, then cut in half hot-dog style and scoop out the seeds with a spoon.)  Then, cut it into about 1-inch pieces.
  4. Add the squash and the stock to the onions – cover and let simmer until the squash is soft (should be around 20 minutes).
    IMAG1093
  5. Remove from heat, and use a stick blender to puree the squash and onion (you can use a regular blender, but it requires the extra step of straining the squash out of the broth, blending, then adding it back in).
    IMAG1096
    The soup should still be pretty thin – if you prefer a thicker soup, just use less stock. (or more squash!)
  6. Add cinnamon, nutmeg, salt, and pepper to taste.  Serves about 10 (depending on portions).

Thursday, November 25, 2010

Summer Projects… Finally Over (Part 2)

Last week I finished our backyard projects we had planned for summertime – 3 months late, yes, but better than never.

With what I like to classify as minimal help from others, I managed to build a deck and a shadowbox privacy fence “from scratch” (this is mostly a recipe blog, after all).  On that side note, here are some step by step instructions on how to build exactly what I did – FENCE EDITION:

HOW TO BUILD A SHADOWBOX STYLE PRIVACY FENCE
Way simpler than building a deck, but takes loads more time.
This is not very detailed.  Sorry.

Tools Needed/Recommended:

  • Circular Saw
  • Sawhorses
  • Level
  • Tape Measure
  • Nail Gun
  • Framing Hammer
  • Post Hole Diggers
  • String
  1. Plan out where you want your fence, clear out any trees, bushes, etc.  We had a big old mulberry tree to dig out, which Phil (our neighbor) basically did by himself. 
  2. Order all your lumber.  We chose not to use panels to build this fence, but it would have been much easier.
    IMAG0572
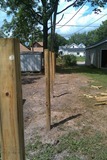
  3. Stretch some string between two stakes on the line where you want the fence to be, and spray marks every eight feet so you know where to dig the holes. 
  4. Dig the holes.  I recommend renting an auger if you have more than ten holes to dig.
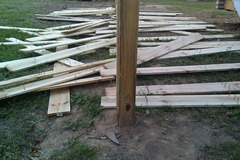
  5. Put in the end posts, or at least one end and maybe a middle post – make sure you dig down deep enough, and use plenty of concrete.  Stretch a string between the two posts, and mark the center of each hole.  This is so you can line up all the posts on the same point. 
    IMAG0616
    Getting the holes and all the posts lined up is honestly the hardest part, because it’s the most crucial part for having a straight fence.
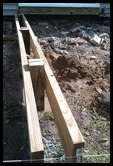
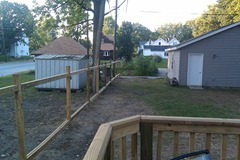
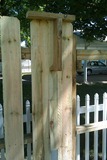
  6. Once the posts are in, you can start putting up the stringers that hold up the pickets. 
    IMAG0635IMAG0719
    We chose to use 5 2x4s per section – 2 up, 2 down, and one in the middle.  We decided to attach 2 “up and down” at the top and bottom so they would resist warping better over time. 
    IMAG0721
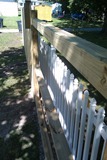
  7. After the stringers are up, attach the pickets.  It helps to make a spacer – we had ours about 3” apart. 
    IMAG0720
    We tried 5”, but after I put some up, we decided to take them down and put them closer together. 
    IMAG0644IMAG0657
    I found it better to use the spacer on one side, and then sort of eyeball the other side – otherwise, the spacing tends to get out of alignment.
    IMAG0658
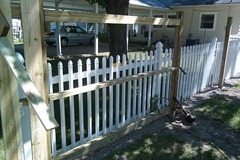
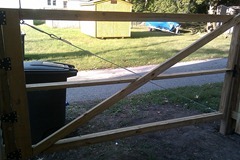
  8. Once your fence is up, build any gates you need. 
    IMAG0773IMAG0777
    We have a large vehicle gate on one end of the yard, and a smaller people gate near the house. 
    IMAG0779 IMAG0847
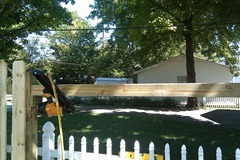
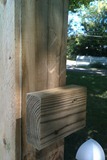
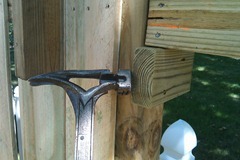
    We had to attach the large gate directly to the garage, and it worked out very well.  No sag at all!
    IMAG0780IMAG0772
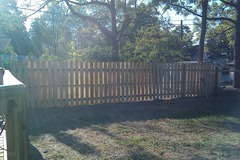
  9. Stain your new fence!  Looks super nice.
    IMAG0980IMAG1013


The whole thing took a long time, mainly because I did most of it myself.  Having a nailgun helped out loads. 
IMAG0716
I had to work a few things out, like how to attach stringers by myself (I just tacked a small piece of 2x4 on one end, and rested the stringer on that while I nailed in the other end), and techniques for installing posts and whatnot will vary depending on who you talk to. 
IMAG0715IMAG0722
It was pretty fun, though, and really nice to be able to say I did it myself.

Tuesday, November 23, 2010

Summer Projects… Finally Over (Part 1)

Last week I finished our backyard projects we had planned for summertime – 3 months late, yes, but better than never.

With what I like to classify as minimal help from others, I managed to build a deck and a shadowbox privacy fence “from scratch” (this is mostly a recipe blog, after all).  On that side note, here are some step by step instructions on how to build exactly what I did – DECK EDITION:

HOW TO BUILD A DECK
More specifically, how to build exactly the deck I built.
Even more specifically (or less, I can’t decide), how to more or less get the gist of how to build exactly the deck I built.

Tools Needed/Recommended:

  • Circular Saw
  • Sawhorses
  • Level(s)
  • Tape measure
  • Framing Hammer
  • Nail Gun(s)
  • Prybar
  • Post-Hole Diggers
  • Chalk Line
  • Electric Drill/Screwdriver
  • 1/2” Electric Drill
  • 1/2” Auger Drill Bit
  • Wrenches
  • Carpenter’s L Square
  • Knee Pads
  1. Plan out your area.  We decided on a 10x22 ft. deck, since we wanted to cover up this ugly electrical conduit on the side of our house.
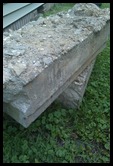
    Get rid of anything that might be in the way, like a crumbling old patio.
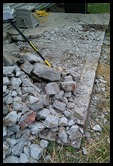
    IMAG0310 IMAG0590
    Clear out any debris, or at least push enough of it around so you can build the deck over/around it. 
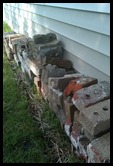
    IMAG0591
    Measure out the area, and mark it with spray-paint or string so you can get used to the area you won’t have any yard in anymore.
    IMAG0576
    Don’t write sentences like that again.
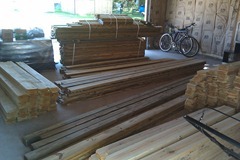
  2. Next you want to order your lumber and materials.  We went to Lowe’s, and they pretty much rocked the house in the helpful department.  They mapped everything out based on what we told them, and created a printout of every piece of lumber and hardware we would need – which changed as we went on, but things happen.
    IMAG0572
    We needed a lot of lumber (this is for a fence too, remember).
  3. Plan, mark, and dig the holes for the support beam posts.  The original plans called for 3 rows of 3 posts, but I changed it to 4 rows for more support.  This meant more digging, but it went fast and I feel safer.
  4. Add posts.
  5. Pour your concrete, add water.
  6. Construct the support beams. 
    IMAG0583 IMAG0587
    I used 2 2x6 boards for each beam.  I had to be careful by the door, since I wanted the final deckboards to match up more or less with the level of the floor of the house – so I had to measure down around 6+1/2” (the width of the joist plus the thickness of a floorboard).  Then I had to make sure every other beam was level with the first one.  This involved a lot of Mary and John helping hold things and check several levels.  Having a nail gun came in handy for this, since I could quickly tack a board in place when it was level.  The beams are attached to each post with 3 half-inch bolts.
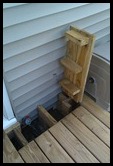
  7. I had to make a mini-beam near the spigot to allow for a trapdoor to be built for water access. 
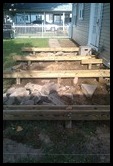
    IMAG0589
    I thought about other alternatives, like extending a pipe outside and up above the deck, but I thought this would be more attractive.  And I liked the idea of a trapdoor. It did mean one more hole to dig, though.
  8. Once your support beams are in place, lay down the 2x6 joists. 
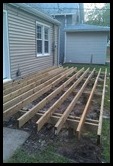
    IMAG0593
    This is pretty simple – I laid a row every foot, so I had 11 rows.  I used the nailgun to tack them in place.  In retrospect, using brackets to really hold them there would probably have been a good idea, but with the deckboards attached, they’re really not going anywhere.
  9. Now lay your deckboards.  This will be horrible.  I recommend kneepads. 
    IMAG0598
    So many screws, so much kneeling.  If you use treated lumber, apparently it is a good idea not to leave gaps between your boards, because the wood will shrink a good deal.  I did not know this.  Oh well.  Just make sure you keep them straight, so they don’t get out of whack after a while.  I used a nail as a spacer.
  10. Once your boards are in place, cut off any long ends and attach some long end boards to make everything look nice.
    IMAG0600
  11. Assemble the railing and stairs – the trickiest part, I thought. 
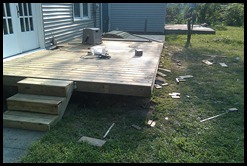
    IMAG0599
    The stair runners came pre-cut, so I just had to trim them down to fit. 
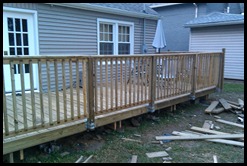
    IMAG0611
    The railing wasn’t that bad, it was just a matter of figuring out where I wanted it to be, and then assembling.  Just a lot of pieces. 
    IMAG0617
    I had to make a mini-railing to allow for a power meter box.  I didn’t plan for it, but I think it looks good anyway.
  12. Build your fantastic trapdoor – make sure it’s supported so it can be walked on.
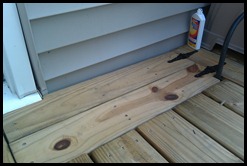
    IMAG0636 IMAG0637
  13. Pick a stain/seal, and you’re done!  Don’t worry about where the last week or two of your life went, and don’t regret picking the hottest, most humid week of August to do all this work, because now you have a sweet outdoor hangout space!
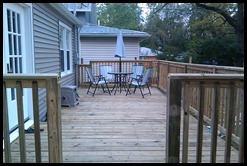
    IMAG0610 IMAG1014

Yes, you will be disgustingly sweaty. 

IMAG0594
On the other hand, the days will seem to fly by, since you’ll be spending every hour of them outside.

Thanks to:

Phil, for helping me move patio debris, and for loaning me your sawhorses for months longer than I’m sure you wanted.

Melinda, for feeding us awesome salsa that I sometimes still think about and want so badly.

John, for willingly helping on two occasions, becoming sweatier than I’m sure anyone is comfortable with.

Mary, for checking things for level and bringing me gallons of water.

Dad and Josh, for fixing the back door and making the deck convenient to use.

Monday, November 1, 2010

Horseradish Cocktail Sandwiches

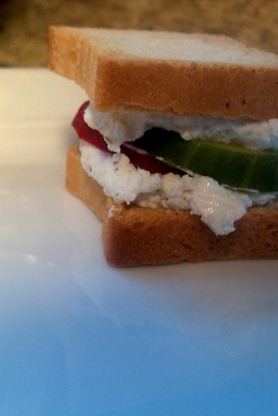
IMAG1005uprighthalfMan do I love horseradish.  And radishes.  I love them because they are a different kind of spicy.  They don’t destroy your mouth/throat/stomach, they go straight for the sinuses – feel the burn, baby.

Anyway, these little sandwiches pack a mini-sized punch – just enough to keep your guests coming back for more.  You will make radish fans out of anyone.

YOU WILL NEED:

  • 2 packs “petits toasts”
  • 1 english (hothouse) cucumber
  • 10 medium-sized radishes
  • 6 oz. goat cheese
  • 2 tsp ground horseradish
  • 1 tsp ricotta cheese
  • 1 tsp crushed dill

YOU WILL NEED TO:

  1. Thinly slice cucumber and radishes.
  2. Mix together cheeses, horseradish, and dill (mash with fork).
  3. Spread mixture on one side of two pieces of mini toast.
  4. Make sandwiches with 1 cucumber slice and 1 or 2 radish slices, depending on size.
  5. Eat!  Super easy, super tasty.  Makes about 35 sandwiches.

IMAG1008

Lemon Lime Cucumber Boats

IMAG0992uprighthalfAnother appetizer made for our fancy party – these little cucumber bites are very refreshing and a little tart.  To me, they really taste like summertime – maybe it’s the dill, I don’t really know. 

All I know is that I like ‘em.

YOU WILL NEED:

  • 2 English (hothouse) cucumbers
  • 4 oz. feta cheese
  • 2 oz. goat cheese
  • 2 tbsp sour cream
  • 1 tbsp lemon juice
  • 1 tbsp lime juice
  • 1.5 tsp crushed dill
  • 1 tsp celery seed

YOU WILL NEED TO:

  1. Peel and cut the cucumbers in half lengthwise – use a spoon to scoop out the seeds.
    IMAG0987
  2. Mix together the cheeses, sour cream, juices, and spices – mash with a fork.
    IMAG0989
  3. Pile mixture into the cucumbers.
  4. Sprinkle some more dill and celery seed over the top.
  5. Splash some more lemon/lime juice over the top.
  6. Cut cucumbers into 1-1.5-inch slices.
    IMAG0991IMAG0992
  7. Set out to be devoured.  Makes about 25.

**It would probably actually be nice to leave the peel on – give it a little more color and crunch.  I just wasn’t sure how people coming to the party felt about their cucumber rinds.